Populating Decision Tables with external data sources
One of the most used artifacts in IBM ODM is the decision table. In this post I will show how to populate your Decision Table in the Rule Designer with external data sources like a .txt file or an excel spreadsheet. Business users can have their logic in multiple sources (mostly in Excel files), that they need to dump in a decision table to create rules and business logic behavior in IBM ODM. We are going to achieve this by using a combination of Java, Ant builds and ilog rule designer-plug ins embedded in our suite. This is a very technical tutorial and it might be a little difficult to get it done quickly but feel free to contact me with any problems or if you get stuck at some point.
Steps:
- Setting up environment
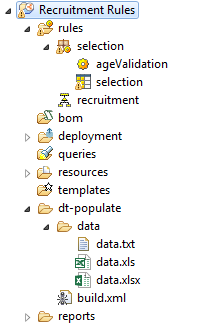
- Create a new folder (in my case “dt-populate”) in your Rule project with a “data” subfolder and with an Ant Build file.
- Tip: You can also create and manage the ant and data configuration in a new external Java project.
- Create an environment variable ECLIPSE_HOME with the location of your IBM ODM installation.
- Insert the txt or the excel file with the data you want to import in the data folder. In my example I am using both, please have this considerations:
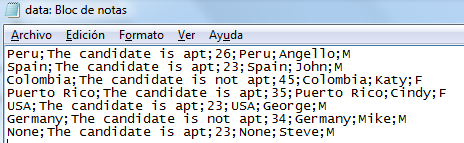
- Txt:
- Separate each cell of the decision table by the semicolon “;”.
- Separate each row of the decision table with a space.
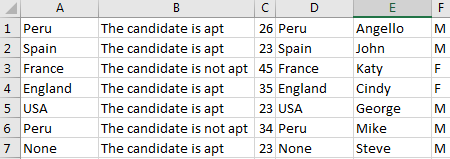
- Excel:
- Separate each cell of the decision table in each excel cell starting in A1.
- Separate each row of the decision table in each excel row.
- Tip: Remember the version of Excel and the file extension because you will need it later on.
- Txt:
- Create a new folder (in my case “dt-populate”) in your Rule project with a “data” subfolder and with an Ant Build file.
- Creating the Ant Build file
- Add the project tag with a name, basedir and a default target attributes.

- Tip: For more about Ant Tasks review my previous post here.
- Inside the project tag we are going to add the properties, conditions, echo messages, definitions and our targets. For each of you will be different depending in your environment and ODM installation.

- Tip: Remember to change the values according to your workspace and installation folders.
- Now let’s add the definitions the includes the properties and connection parameters.
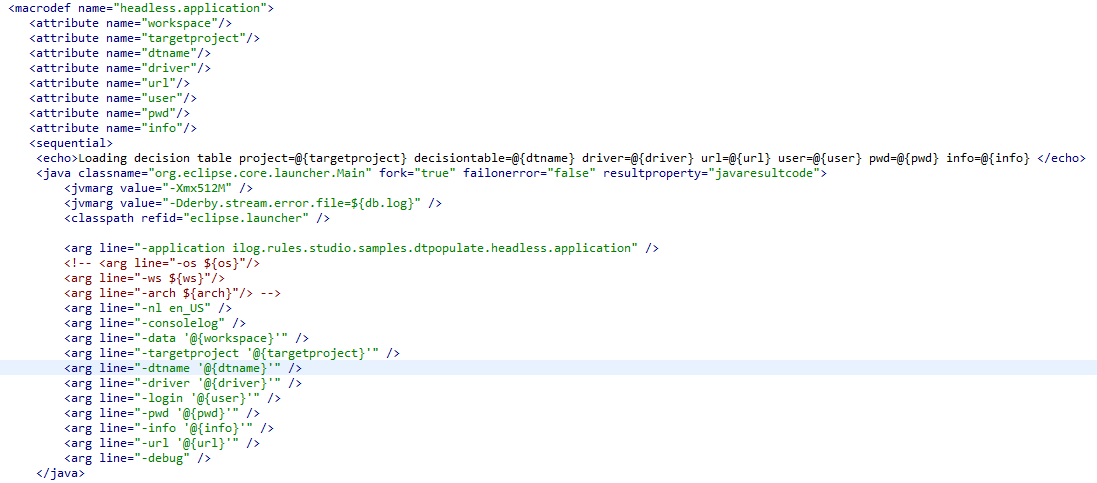

- Finally, we add the targets.
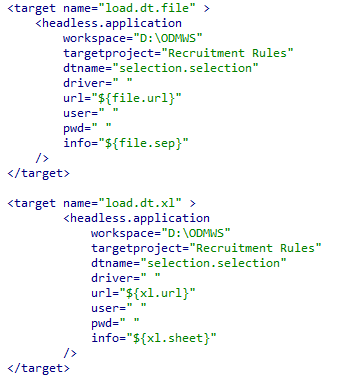
- Remember to change the values according to your environment and also review the excel file extension.
- Add the project tag with a name, basedir and a default target attributes.
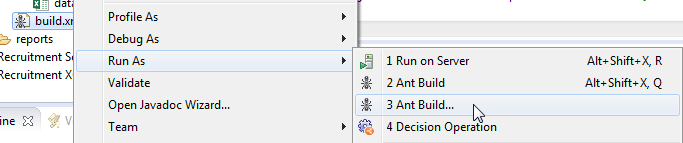
- Running the Ant build file targets
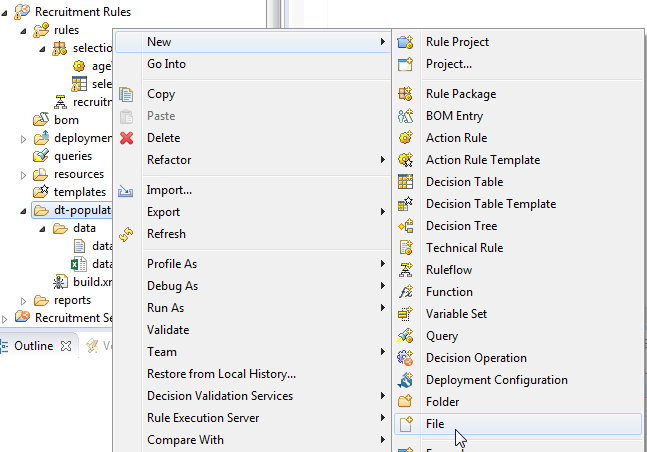
- Right click the build.xml file and select Run As –> Ant build…
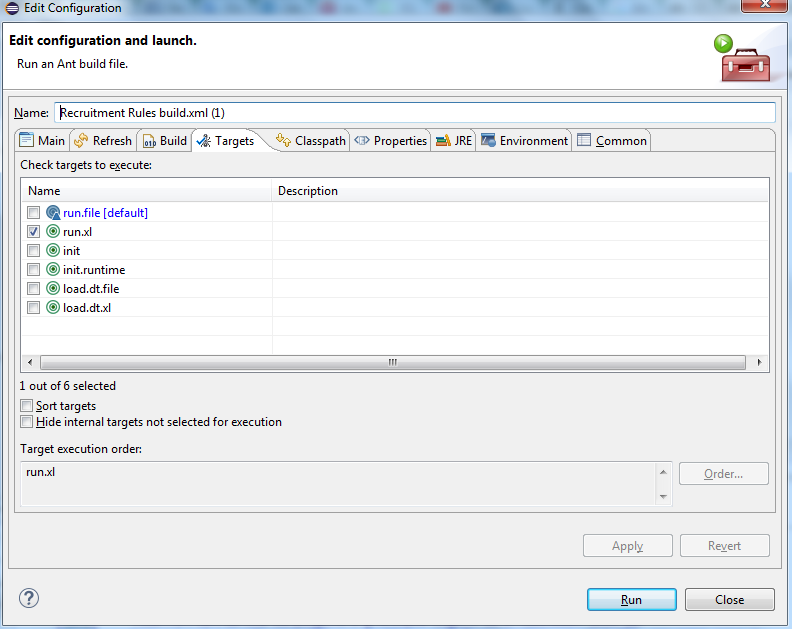
- Select the target you want, in this sample I will run the Excel file target, and click Run.
- You will see the console messages and at the end BUILD SUCCESSFUL.
- Right click the build.xml file and select Run As –> Ant build…
Results:
Now you can refresh and open your Decision Table and visualize all the values!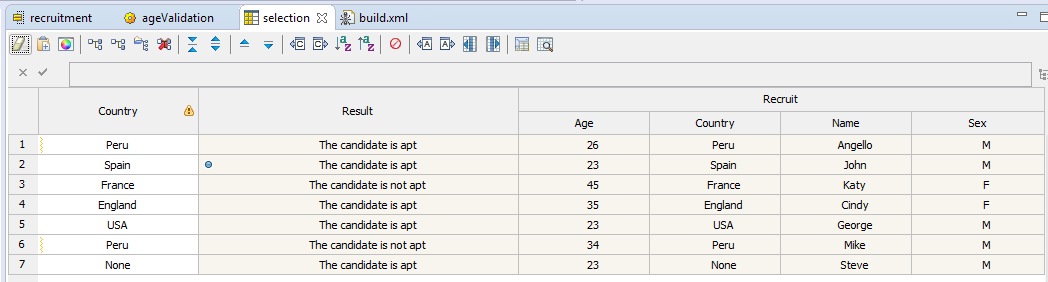
I hope you enjoy this tutorial, there are many more automation and integration to be done with Ant Tasks, please let me know what you wish to see next, and as always feel free to comment or contact me with any feedback or support! Thank you!
- Published in Ant Tasks, Decision Table, Java, Rule Authoring, Rule Designer
Decision Composer, integration with Rule Designer
In this post I will show a new way to start your Rule Projects, using a new IBM Bluemix Business Rules service feature called “Decision Composer”. This is currently in experimental mode but you can start to fully utilize its main features and see if it helps you in your organization. The decision composer is a new way to model your rules using the Decision Modeling Notation (learn more about DMN here), it is also very useful to business users with no ODM technical skills to define and model Rule Projects.
Steps:
- Creating a Decision Composer project
- First we need to access our IBM Bluemix account and select our Business Rules Service. If you don’t have an account or the Business Service installed please refer to my previous Bluemix post here.
- Click on the “Open Decision Composer”
- Click “New Project”, give it a name and click “Create Project”. For this sample I will create a simple recruitment eligibility rule.
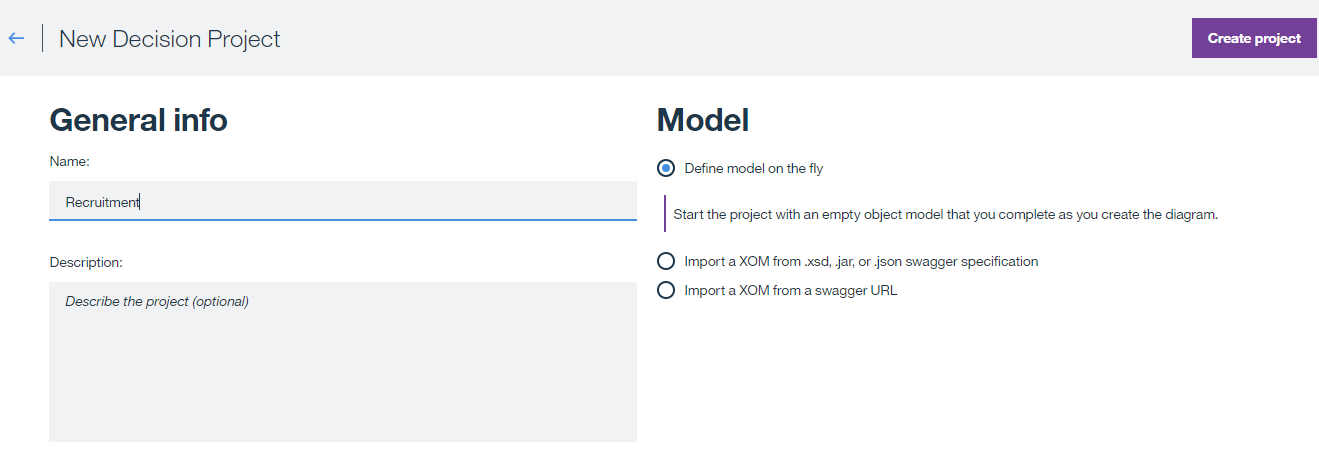
- Tip: You can import your XOM schema from a file or URL too
- Modeling rules in the Decision Composer
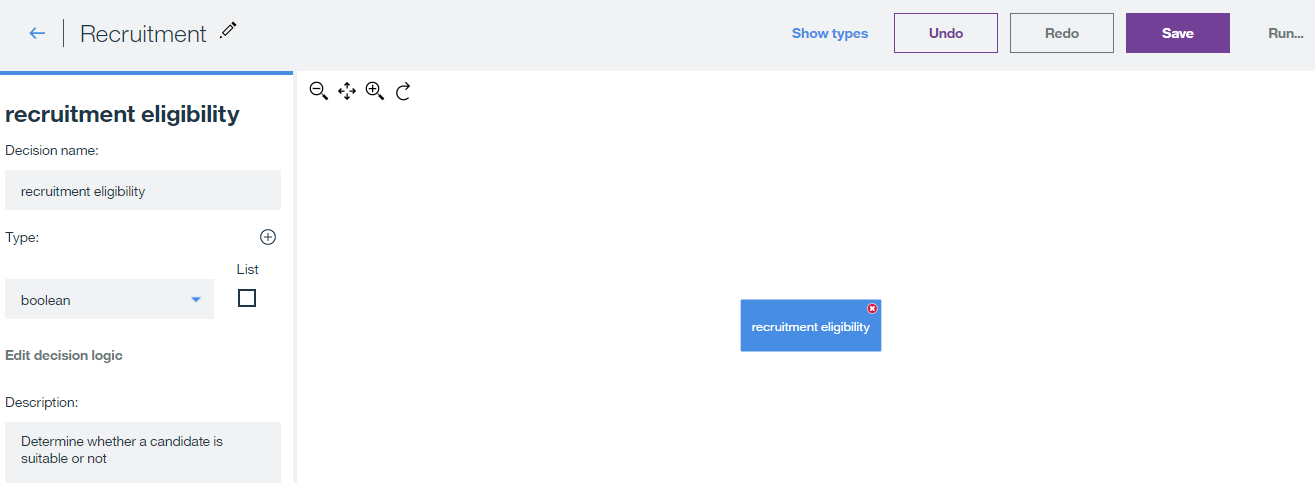
- By default we get a decision “Hello World” with a message, we can simply erase these 2 artifacts.
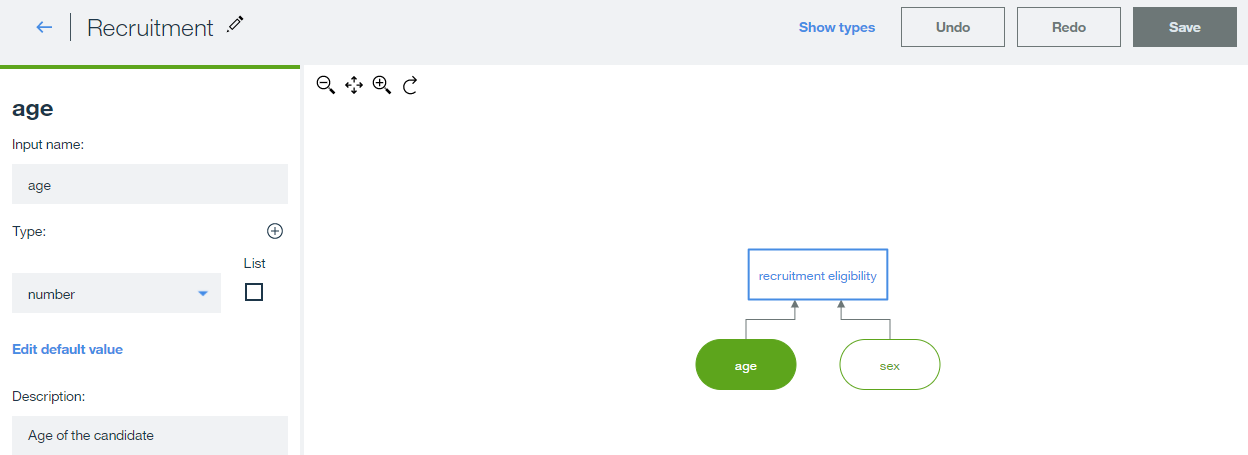
- Create a “data node”, it will create a square box representing a Decision Node. Click on it to modify it’s properties on the left panel. For my sample the output is a Boolean (true or false).
- Now that we have our Decision Node we need to add the Input data that will determine the rule outcome. Hover over decision node, click the + symbol and select “Input Data”.
- Do the same for each data field you need in your rule, in my sample I will need the age and sex of the candidate.
- Tip: Remember you can specify default values for each data
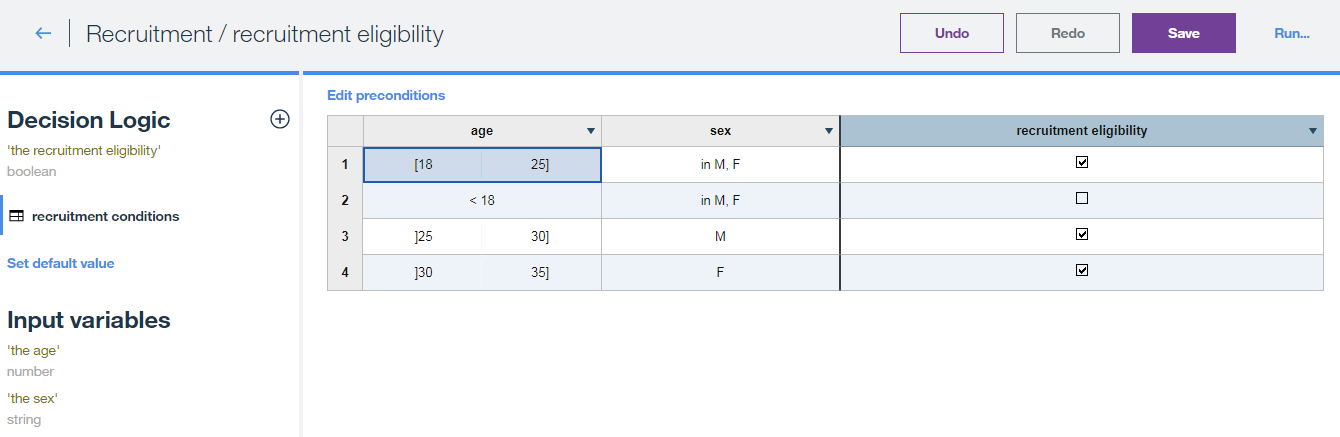
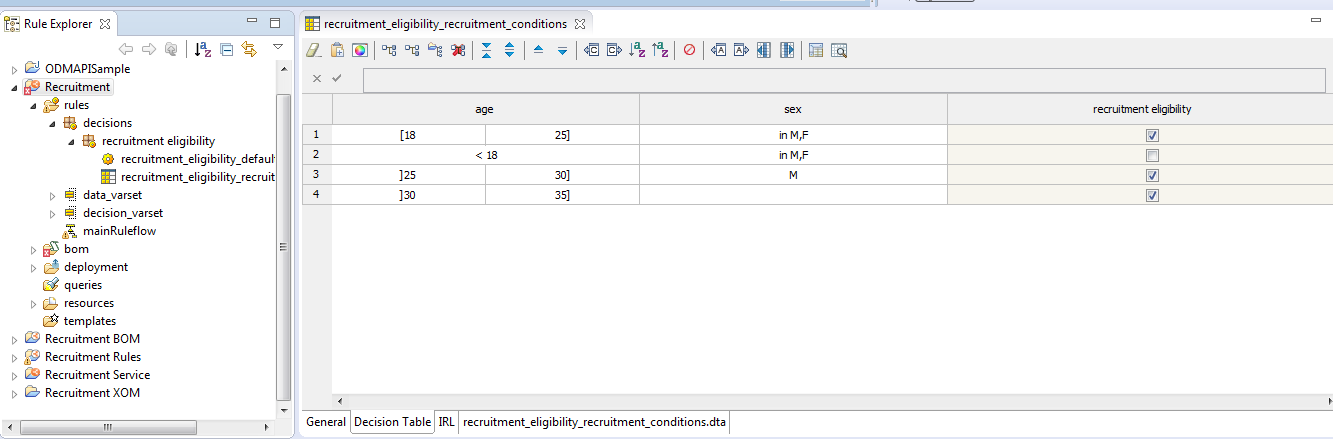
- Now we need to edit our business logic. Select the decision node and click “Edit decision logic” on the left panel. We can work with rule actions or decision tables. In this sample I will use a simple decision table to specify some rules:
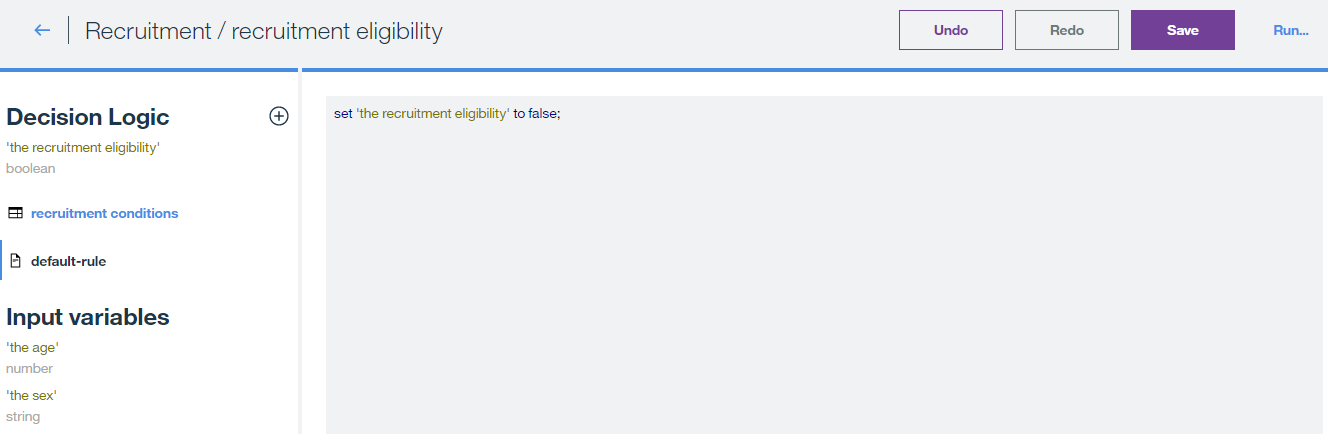
- Set a default value for the outcome variable:
- Save your changes.
- Testing and deploying our Decision project
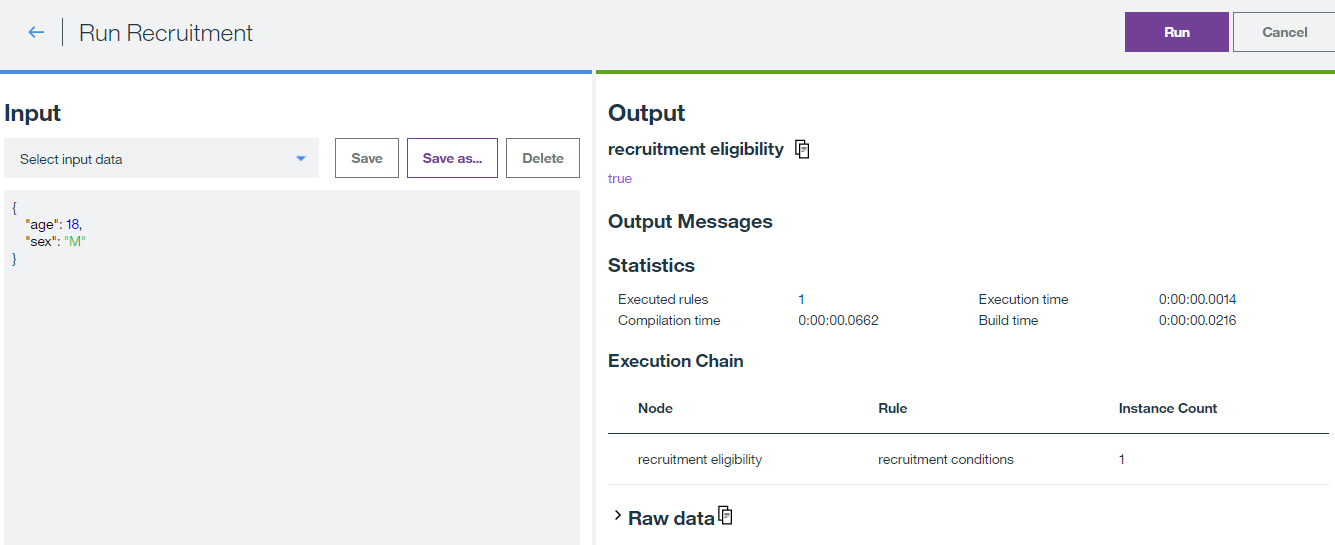
- Return to the main project screen, click “Run” and test the different scenarios of your rules:
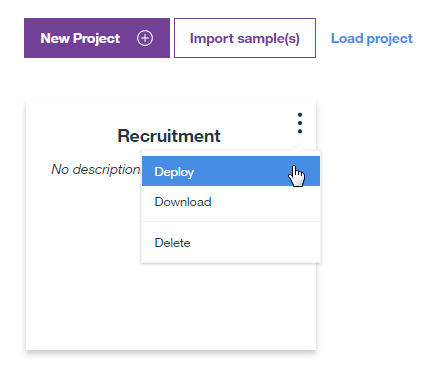
- Now you can deploy your project to your Bluemix Business Rules RES. Return to the project selection screen, hover over your decision project and click “Deploy”
- Input the Bluemix RES URL, username and password. Your rule is ready to use on the cloud.
- Return to the main project screen, click “Run” and test the different scenarios of your rules:
- Integrating the project with IBM ODM Rule Designer
- A great feature is that you can download this project and import it to your Rule Designer Eclipse workspace.
- In the same options list, click “Download”.
- In your Rule Designer workspace select File – Import – Existing projects into Workspace. Search for the files by viewing all file types and that’s it!
Let me know if you want to see more content like this and explore with the Decision Composer and DMN more. I hope you enjoy this tutorial and as always please feel free to contact me for any feedback or questions! Thank you!
- Published in Bluemix, Cloud, Rule Authoring, Rule Designer