ODM on Docker!
If you are a DevOps enthusiast like me you probably love Docker and have been using it for a while. If you are new to Docker, please check this link to learn more.
IBM released an IBM ODM Docker image designed for developers and free to use, in this tutorial we are going to set it up step by step and gain full functionality of this amazing feature. My setup for running this tutorial is:
- Host machine: Windows 10 Pro
- Elementary OS (Ubuntu Dist.) Virtual Box Machine with Docker (I tried using my Alpine-Docker image but I encountered some extra configurations needed for the ODM JVM, contact me for more information about this subject)
- Eclipse Luna with Rule Designer for developers plugin
Steps:
- Install IBM ODM Docker image
- Open a new terminal window and run the following command: docker pull ibmcom/odm

- This will download all the ODM files and create the IBM ODM image. Depending on your internet conection this process could take a few minutes.
- Now run the following command to start the docker IBM ODM container instance:
docker run -e LICENSE=accept -p 9060:9060 -p 9443:9443 ibmcom/odm
- Note that we are passing an environment value to accept the license and mapping the ports 9060 and 9443. If you run with JVM memory problems use -m 1g or the amount of java heap size memory you can use for this container to run smoothly and faster.
- If everything went well you should see the beautiful IBM ODM logo printed in the terminal

- Now you are ready to use:
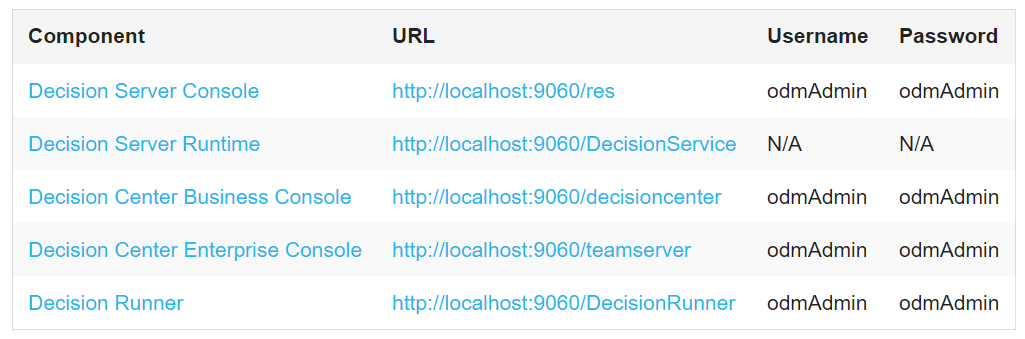
- Note that if you are using a Virtual Box VM like me you need to configure your networks and ip addresses to use the web applications in your host. In my case I use the 192.168.56.101 ip. See Host-Only adapter configurations and verify your networks by pinging the VM ip.
- Open a new terminal window and run the following command: docker pull ibmcom/odm
- Verify Installation
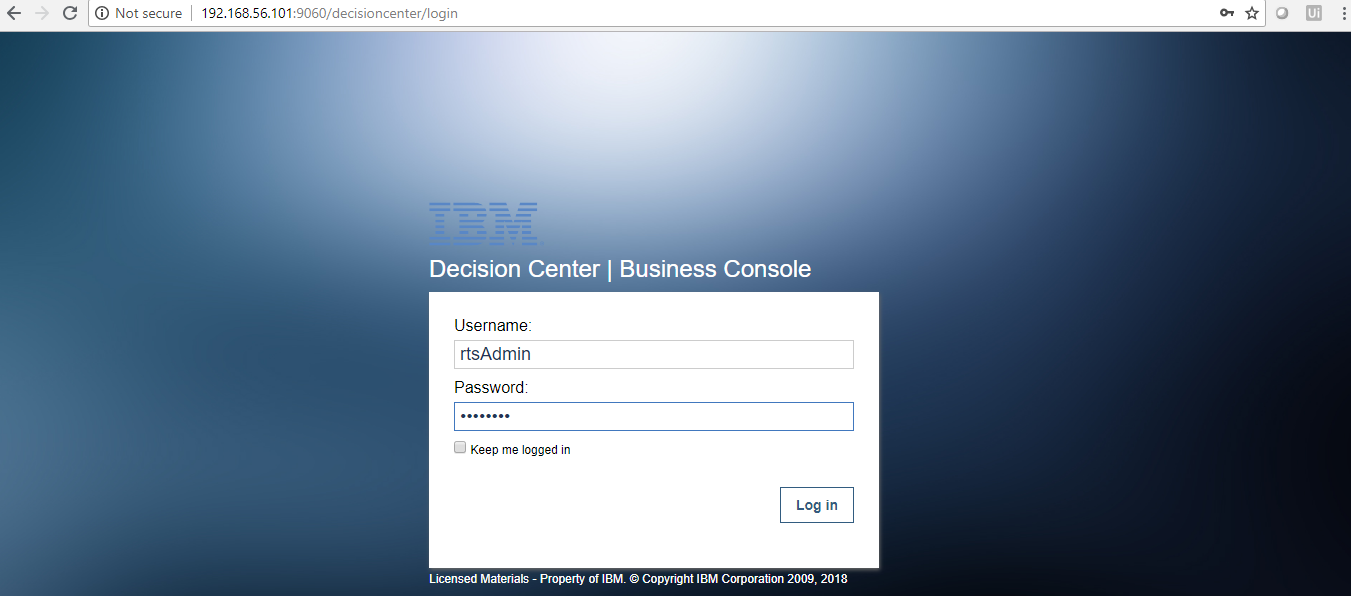
- Open the Decision Center, you should be able to log in odmAdmin or rtsAdmin:
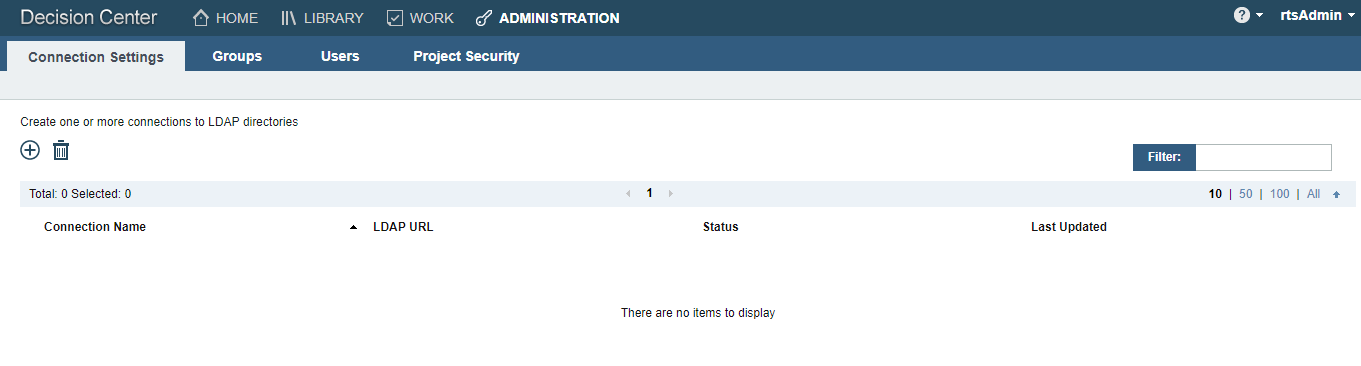
- And have a clean installation:
- Open the Decision Center, you should be able to log in odmAdmin or rtsAdmin:
-
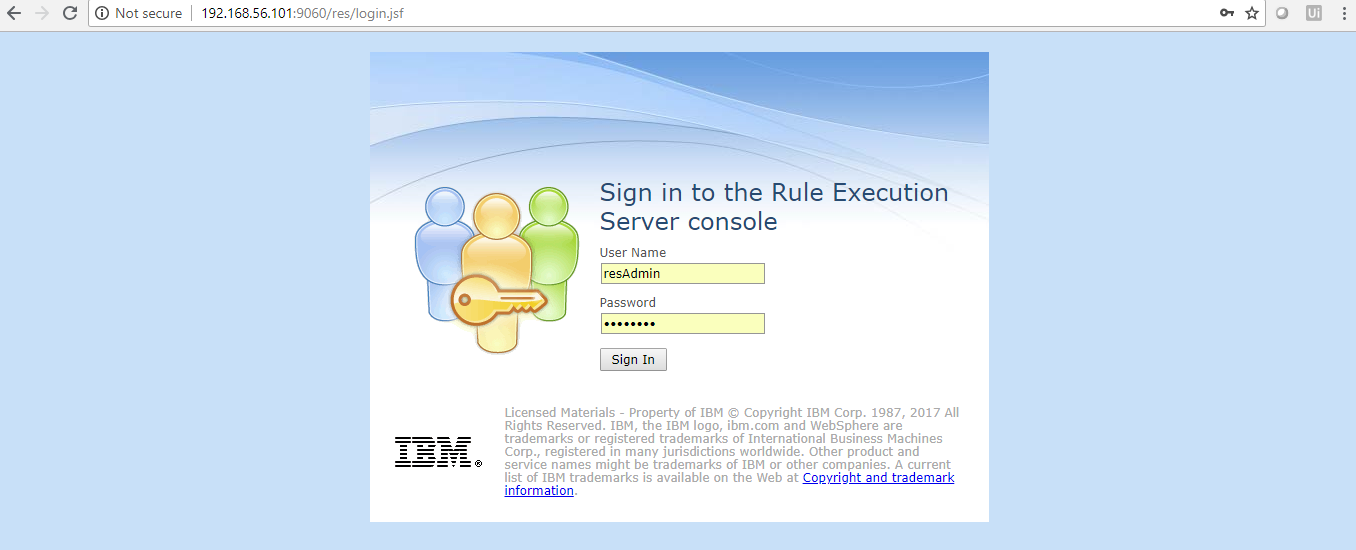
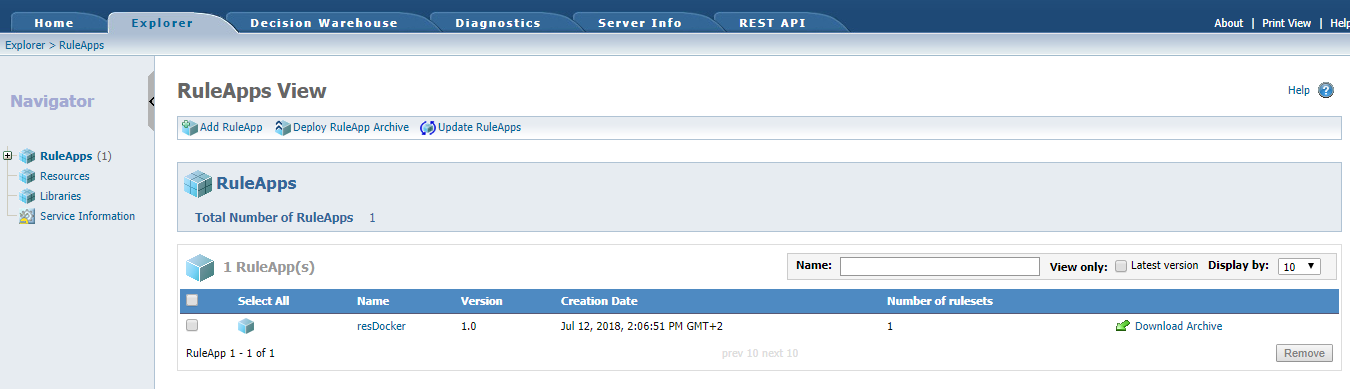
- Open the RES console, now use resAdmin:
- And also see no RuleApps deployed:
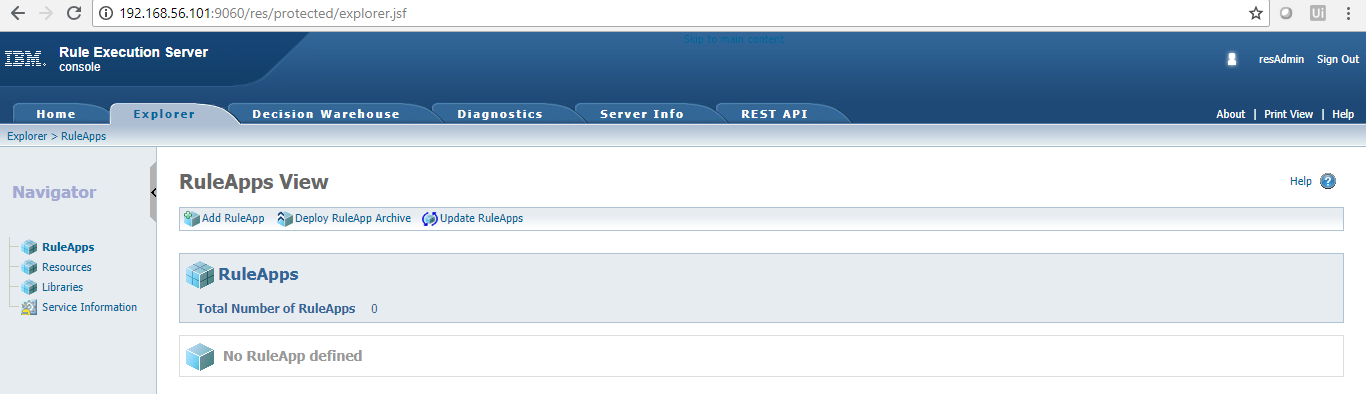
- Open the RES console, now use resAdmin:
- Install Eclipse with IBM ODM plugin
- Download and install Eclipse.
- Navigate to https://marketplace.eclipse.org/content/ibm-operational-decision-manager-developers-rule-designer and drag and drop the install

- Follow the instructions and reboot Eclipse, you should now see the Rule Designer perspective:

- Test IBM ODM on Docker
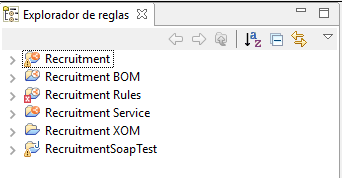
- Create a new project or import an existing project, I am going to use the Recruitment Service demo that I’ve using on previous posts:
- Connect the main project to the Decision Center

- Enter the proper URL and credentials and test the conection:

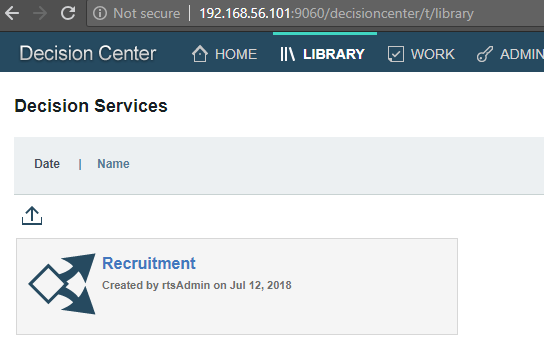
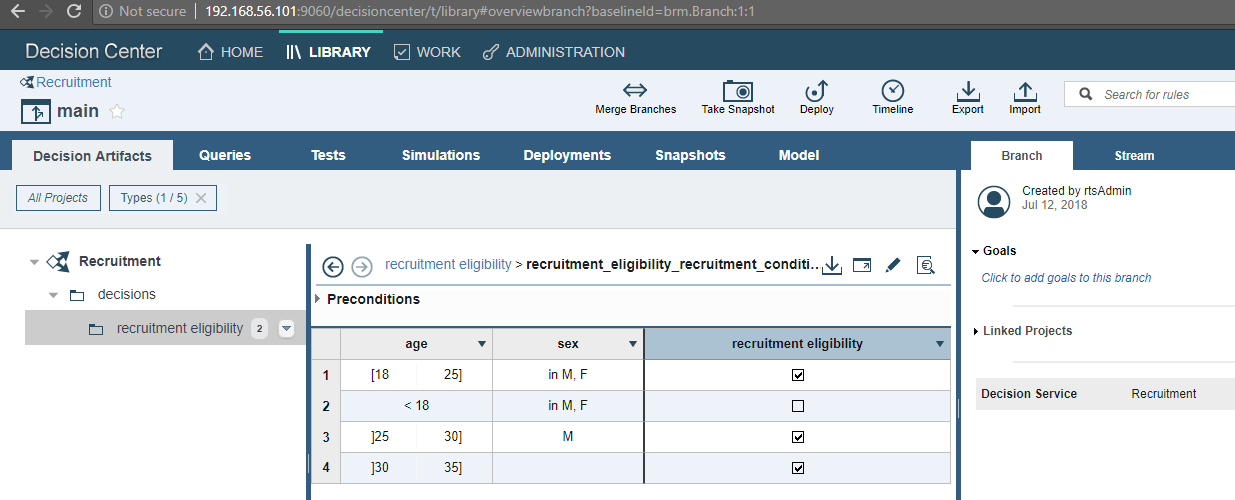
- Navigate to the Decision Center and verify the Decision Service is uploaded correctly:

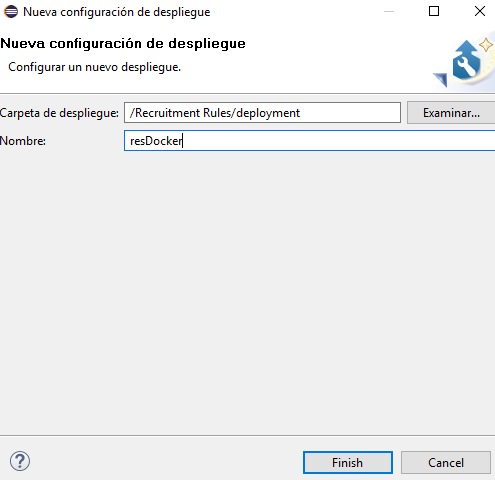
- Now we will test the deployment to the RES console, create a new Deployment Configuration
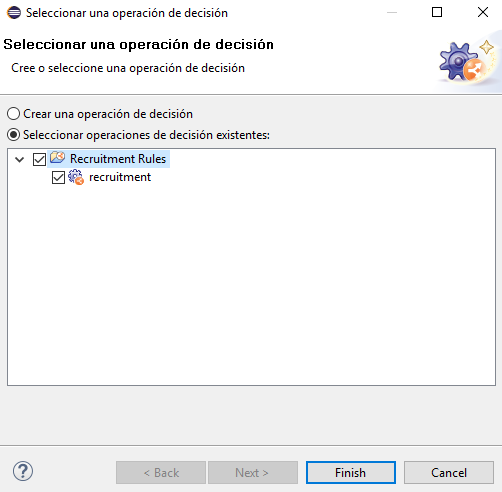
- Add a Decision Operation
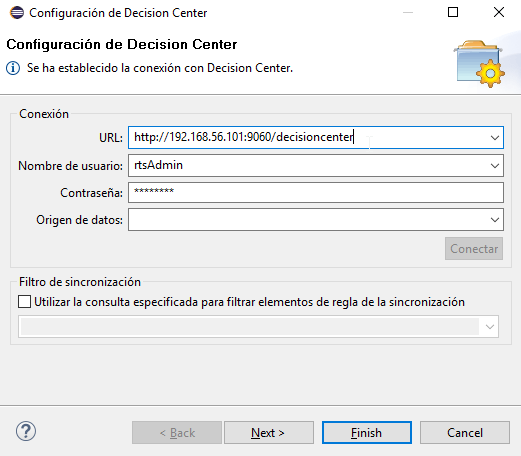
- Add the ODM docker RES service
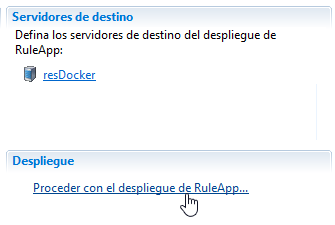
- Deploy the Ruleapp and select the recently added server

- Verify the ruleapp deployed correctly
- Create a new project or import an existing project, I am going to use the Recruitment Service demo that I’ve using on previous posts:
As you can see we setup an ODM distribution in minutes and got a project sync with Decision Center and deployed in the RES console. ODM on Docker is great, we can use all the Docker containers and images functionalities.
I hope you enjoy this tutorial and as always please feel free to contact me for any feedback or questions! Thank you!
- Published in Cloud, Decision Center, Docker, Rule Designer, Rule Execution Server (RES)
Decision Composer, integration with Rule Designer
In this post I will show a new way to start your Rule Projects, using a new IBM Bluemix Business Rules service feature called “Decision Composer”. This is currently in experimental mode but you can start to fully utilize its main features and see if it helps you in your organization. The decision composer is a new way to model your rules using the Decision Modeling Notation (learn more about DMN here), it is also very useful to business users with no ODM technical skills to define and model Rule Projects.
Steps:
- Creating a Decision Composer project
- First we need to access our IBM Bluemix account and select our Business Rules Service. If you don’t have an account or the Business Service installed please refer to my previous Bluemix post here.
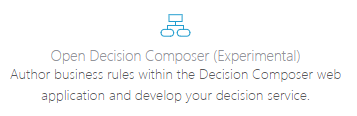
- Click on the “Open Decision Composer”
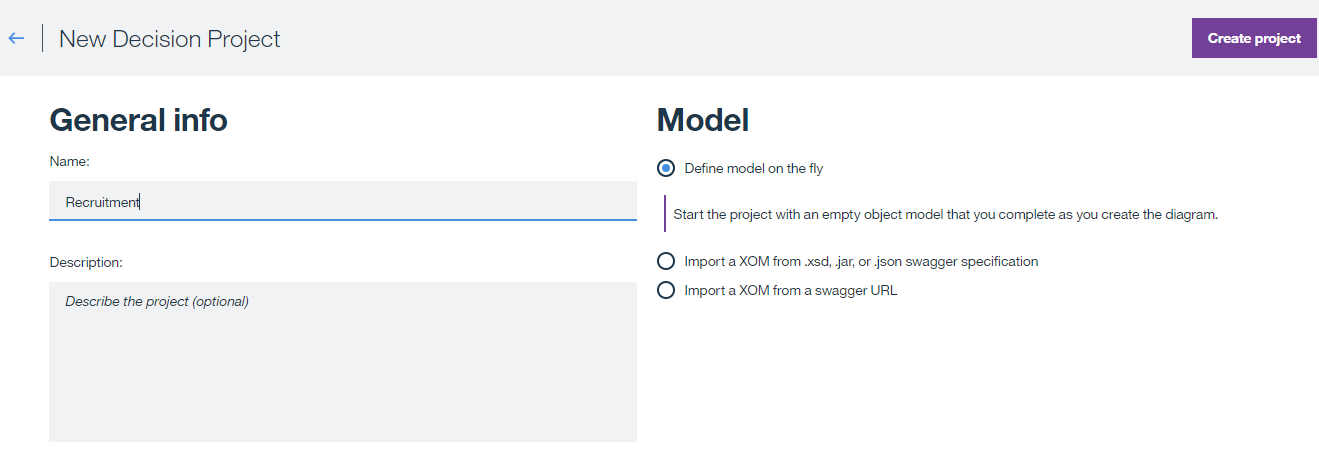
- Click “New Project”, give it a name and click “Create Project”. For this sample I will create a simple recruitment eligibility rule.
- Tip: You can import your XOM schema from a file or URL too
- Modeling rules in the Decision Composer
- By default we get a decision “Hello World” with a message, we can simply erase these 2 artifacts.
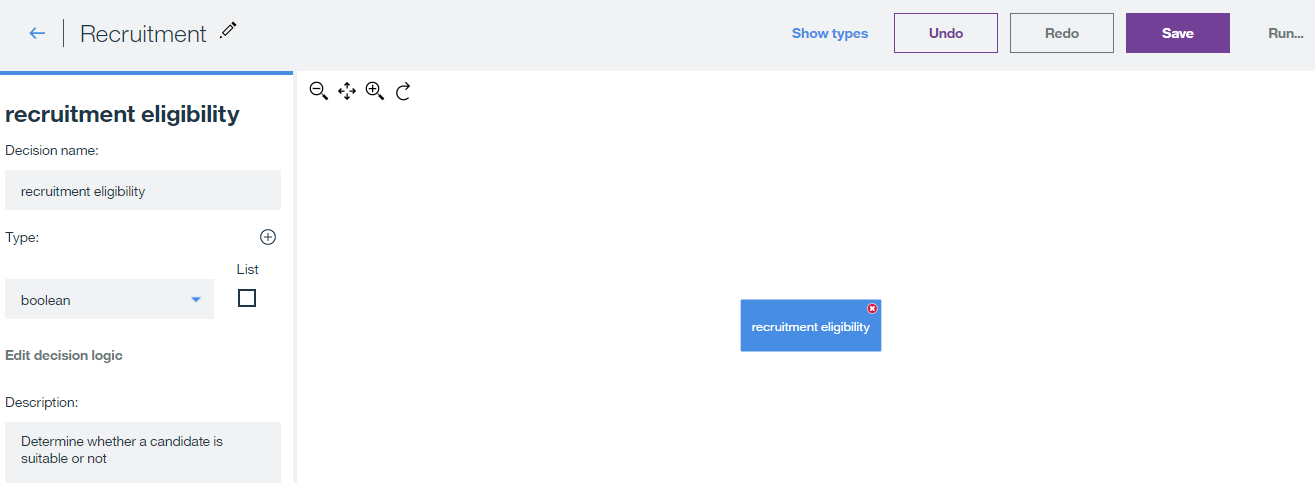
- Create a “data node”, it will create a square box representing a Decision Node. Click on it to modify it’s properties on the left panel. For my sample the output is a Boolean (true or false).
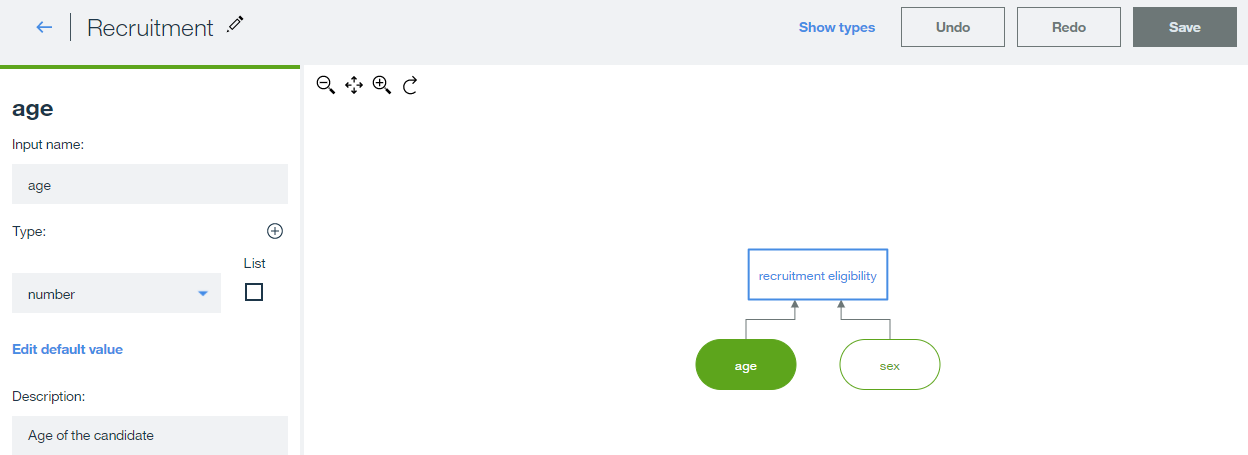
- Now that we have our Decision Node we need to add the Input data that will determine the rule outcome. Hover over decision node, click the + symbol and select “Input Data”.
- Do the same for each data field you need in your rule, in my sample I will need the age and sex of the candidate.
- Tip: Remember you can specify default values for each data
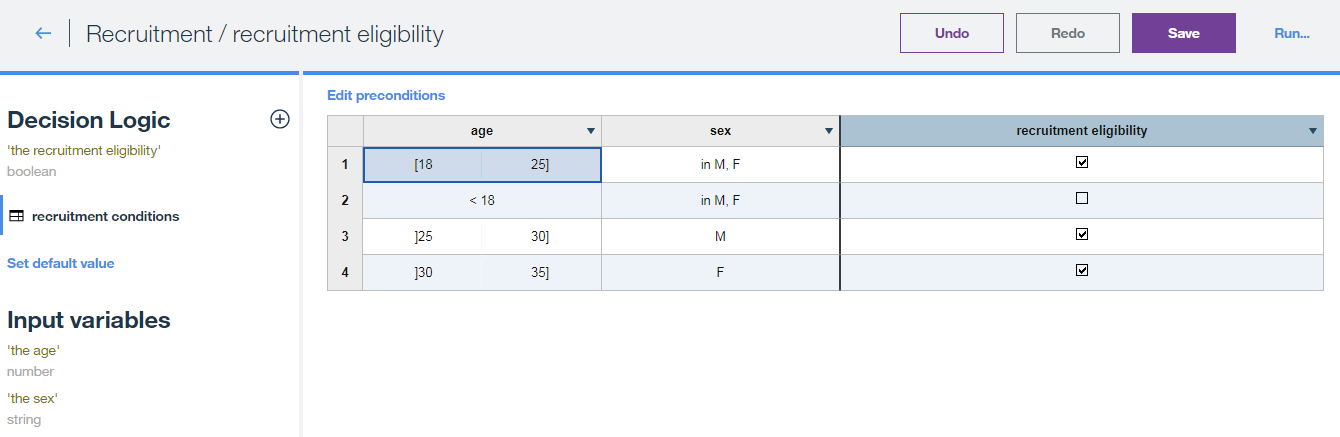
- Now we need to edit our business logic. Select the decision node and click “Edit decision logic” on the left panel. We can work with rule actions or decision tables. In this sample I will use a simple decision table to specify some rules:
- Set a default value for the outcome variable:
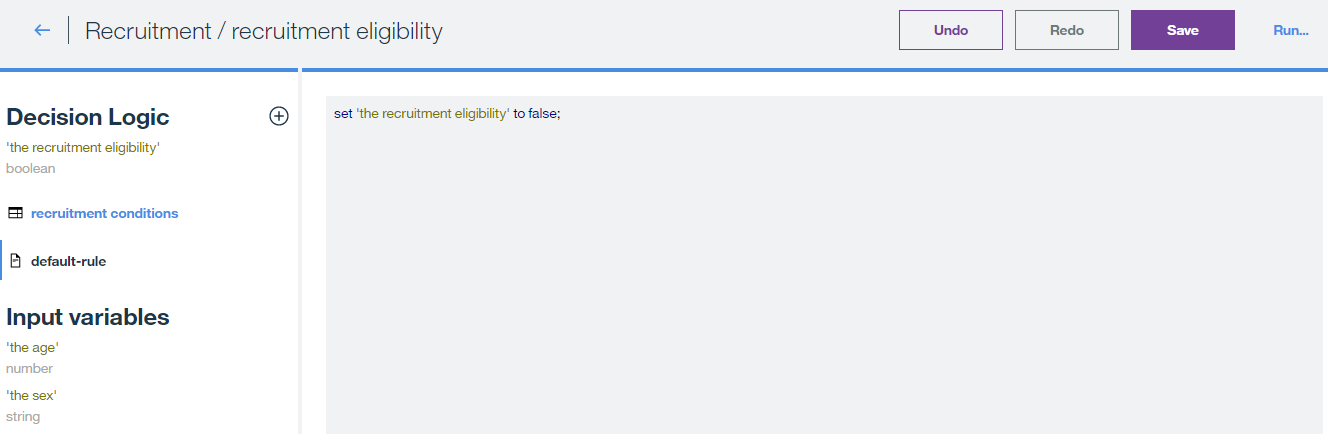
- Save your changes.
- Testing and deploying our Decision project
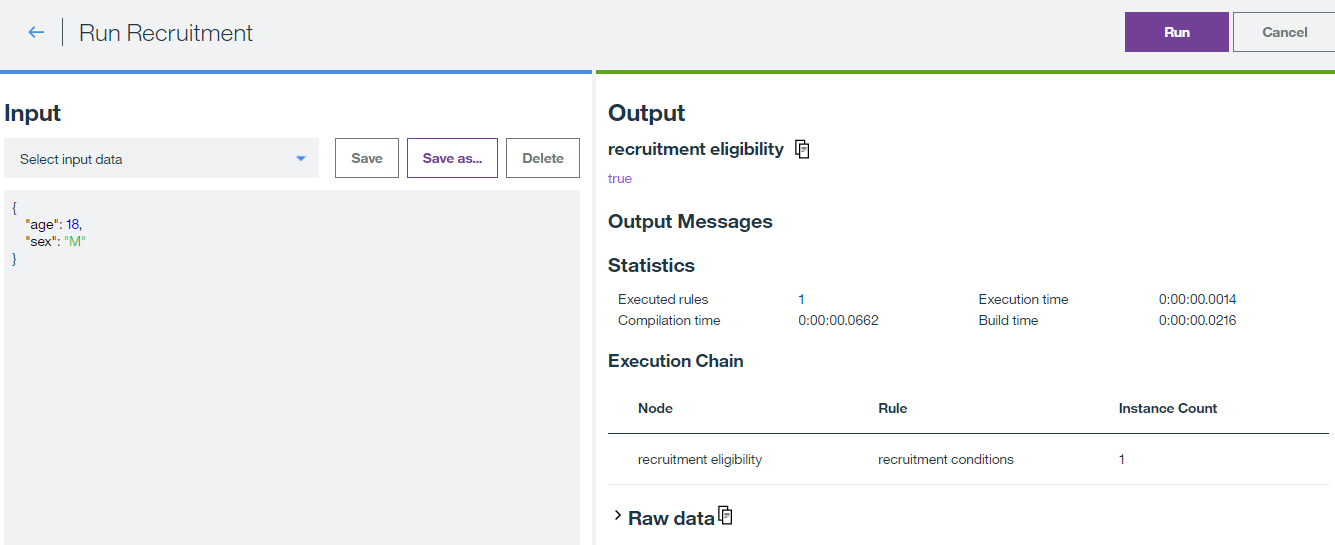
- Return to the main project screen, click “Run” and test the different scenarios of your rules:
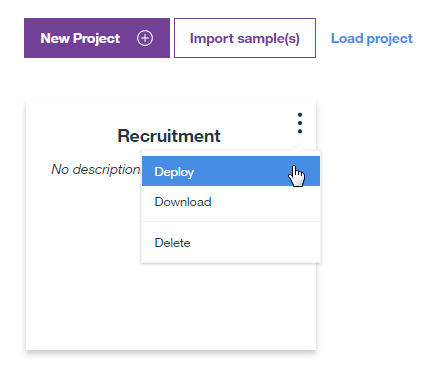
- Now you can deploy your project to your Bluemix Business Rules RES. Return to the project selection screen, hover over your decision project and click “Deploy”
- Input the Bluemix RES URL, username and password. Your rule is ready to use on the cloud.
- Return to the main project screen, click “Run” and test the different scenarios of your rules:
- Integrating the project with IBM ODM Rule Designer
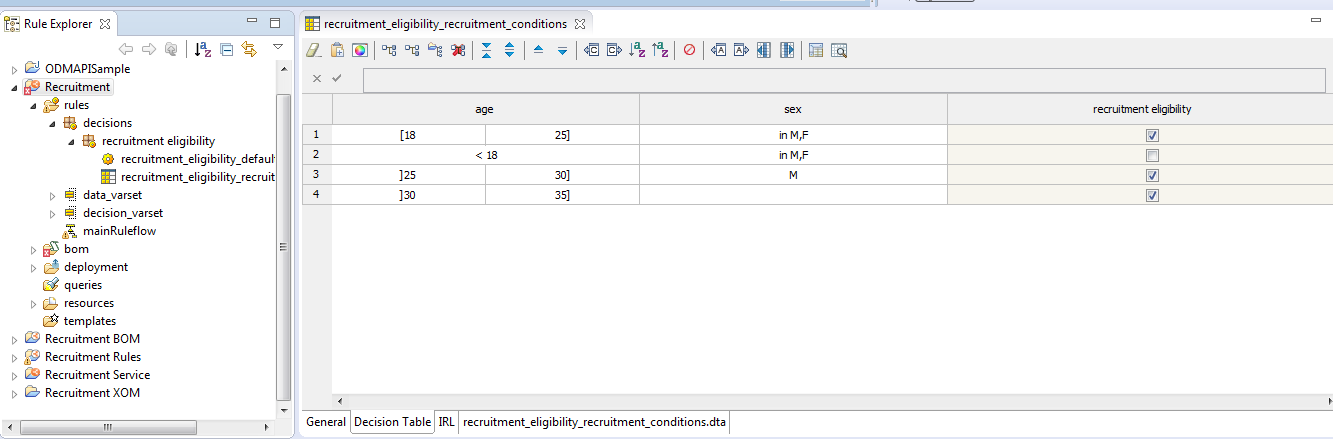
- A great feature is that you can download this project and import it to your Rule Designer Eclipse workspace.
- In the same options list, click “Download”.
- In your Rule Designer workspace select File – Import – Existing projects into Workspace. Search for the files by viewing all file types and that’s it!
Let me know if you want to see more content like this and explore with the Decision Composer and DMN more. I hope you enjoy this tutorial and as always please feel free to contact me for any feedback or questions! Thank you!
- Published in Bluemix, Cloud, Rule Authoring, Rule Designer
Deploying Rule projects into IBM Bluemix
IBM Bluemix is a cloud platform that helps you solve real problems and drive business value with applications, infrastructure and services. There are other powerful cloud services like AWS, Azure or Google Cloud platform but IBM Bluemix comes with pre-designed services for your IBM software solutions. In this article we will see how the Business Rules service allows us to deploy our Decision Operations from Rule Designer or Decision Center console directly to IBM Bluemix cloud. In order to test this you will need to create a IBM Bluemix account that comes with 30 days free trial.
Steps:
- Creating the Business Rules service
- Login to your IBM Bluemix account.
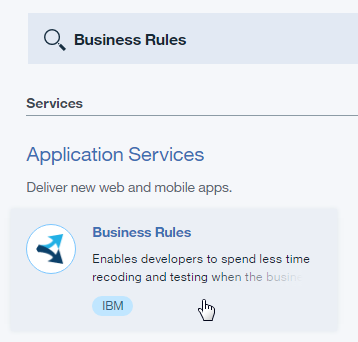
- Click “Catalog” and search for “Business Rules”
- Tip: This service gives you 1,000 API calls free per month that is more than enough for dev purposes, you can cancel the service at any time.
- Click “Create” and give a proper name.
- Navigate to the “Connection Settings” tab and you should be able to see the connection details like this:
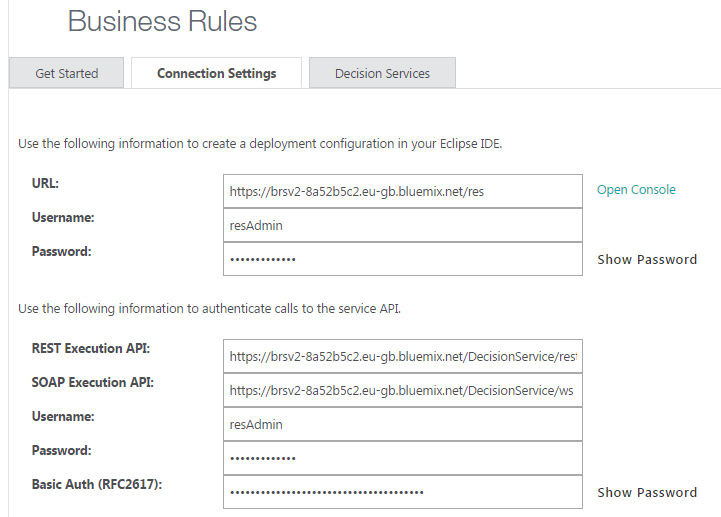
- Tip: Click “Open Console” and navigate just like in your RES local installation.
- Configuring the Deployment
- Now that our Business Rules service on IBM Bluemix is ready, let’s configure and deploy the Rule project.
- Open Rule Designer and navigate to the deployment folder of the Rule project.
- If you have a previous deployment configuration already set up you can just add the new IBM Bluemix RES server target:
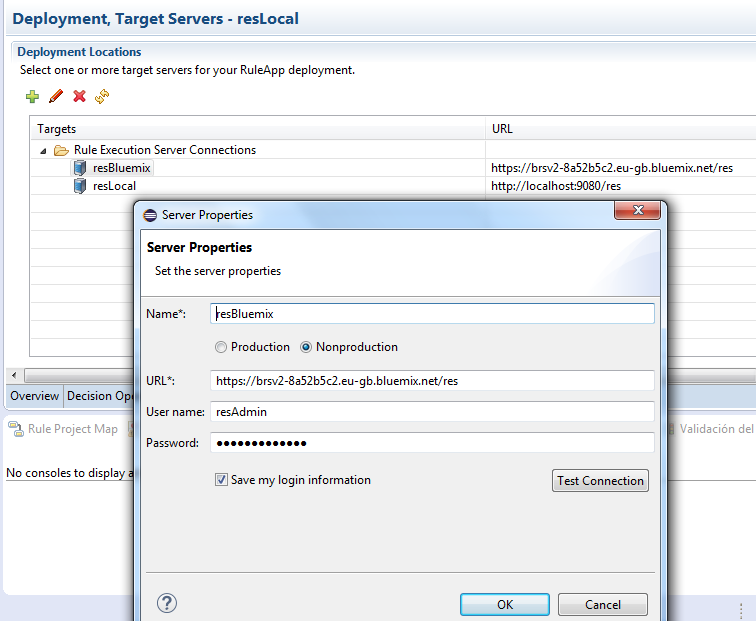
- Insert the Bluemix connection details and test the connection.
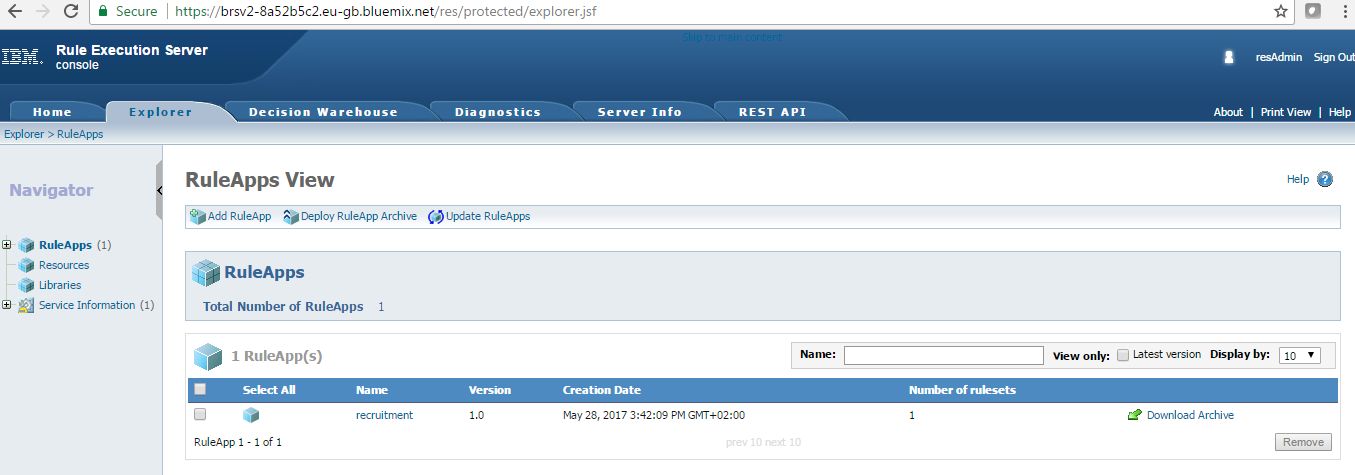
- Deploy the Decision Operation Ruleapp and verify the deployment by accessing the IBM Bluemix RES console.
- The Ruleapp should appear like this:
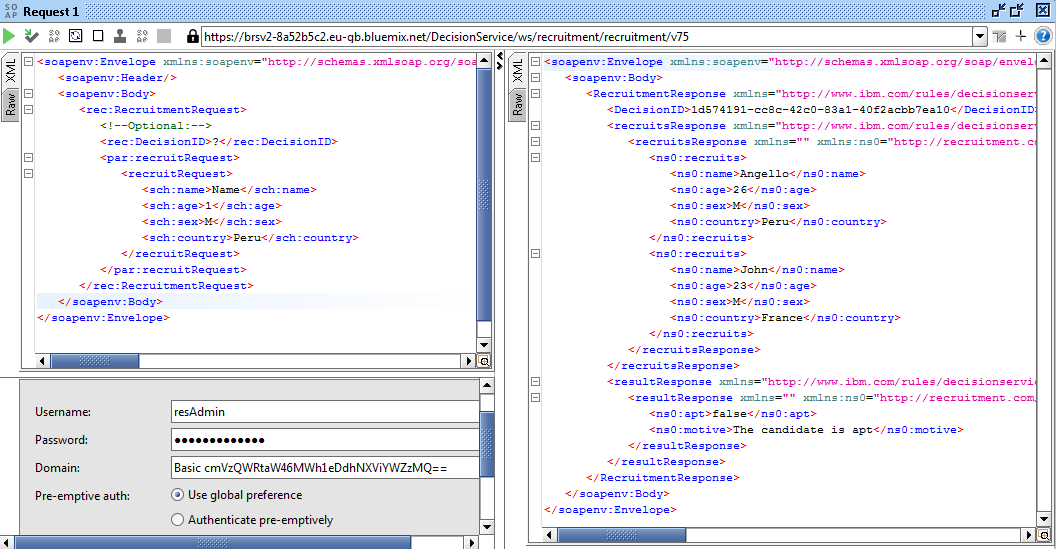
- Testing our Rule web service in SoapUI
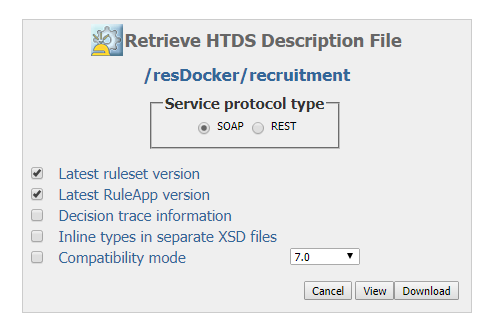
- Navigate to the Ruleset view by clicking on the Ruleapp Name and then the Ruleset name in the RES console.
- Click the “Retrieve HTDS Description File” option:

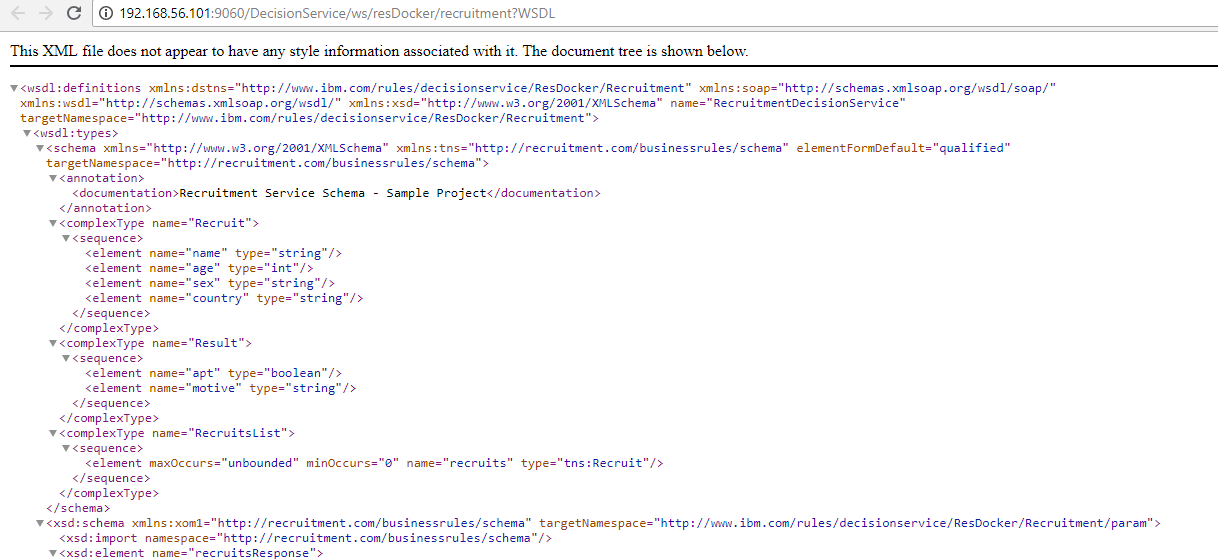
- Download the SOAP HTDS file or click view and copy the WSDL URL.
- Open SoapUI and create a New SOAP project.
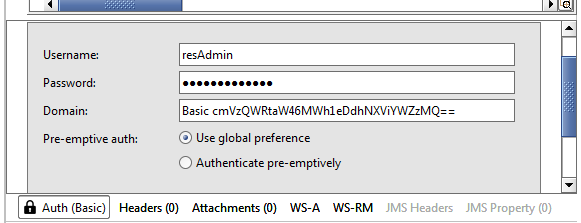
- Insert the wsdl URL, username and password.
- Now you have the request ready, the only thing missing is the security authorization. Click the “Auth” option and select Basic, type the Bluemix Business Rules service username and password.
Results:
You are ready to call your Rules from anyplace, anywhere. Just share your WSDL url with the client application and give the proper authorization. Having the Rule Execution Server on the cloud is a great way to test your rules in development without depending on your local Sample Server.
I hope you enjoy this tutorial and as always please feel free to contact me for any feedback or questions! Thank you!
- Published in Bluemix, Cloud, Rule Authoring, Rule Designer, Rule Execution Server (RES)