In this post I will show a new way to start your Rule Projects, using a new IBM Bluemix Business Rules service feature called “Decision Composer”. This is currently in experimental mode but you can start to fully utilize its main features and see if it helps you in your organization. The decision composer is a new way to model your rules using the Decision Modeling Notation (learn more about DMN here), it is also very useful to business users with no ODM technical skills to define and model Rule Projects.
Steps:
- Creating a Decision Composer project
- First we need to access our IBM Bluemix account and select our Business Rules Service. If you don’t have an account or the Business Service installed please refer to my previous Bluemix post here.
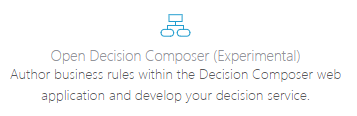
- Click on the “Open Decision Composer”
- Click “New Project”, give it a name and click “Create Project”. For this sample I will create a simple recruitment eligibility rule.
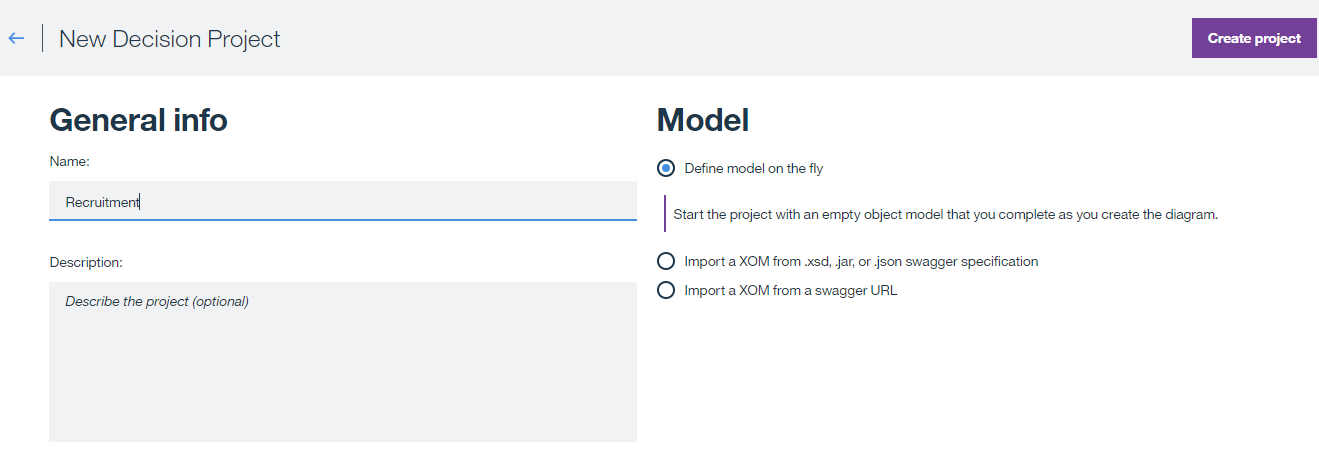
- Tip: You can import your XOM schema from a file or URL too
- Modeling rules in the Decision Composer
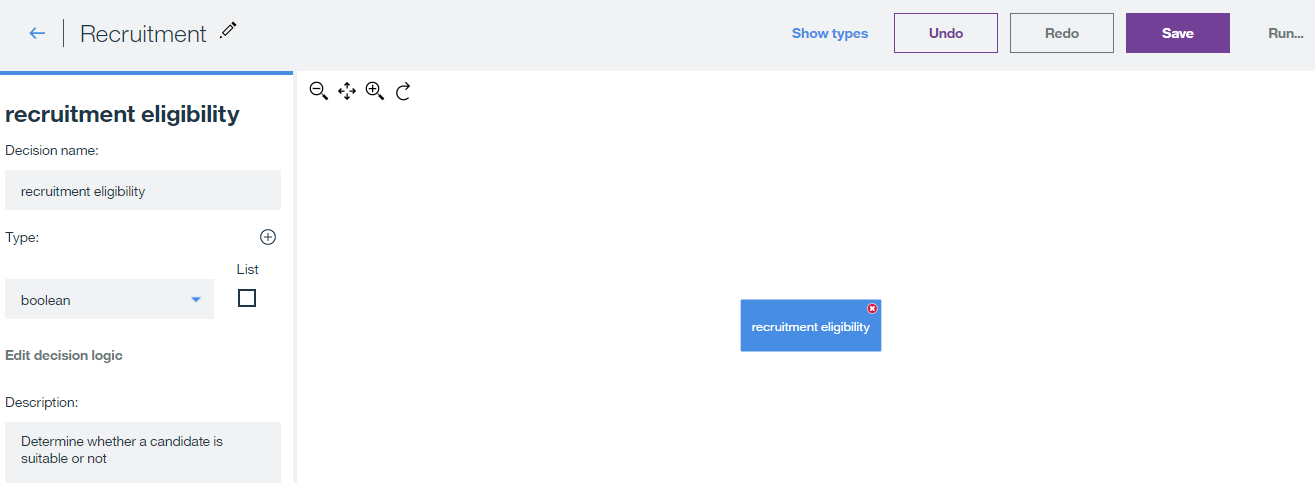
- By default we get a decision “Hello World” with a message, we can simply erase these 2 artifacts.
- Create a “data node”, it will create a square box representing a Decision Node. Click on it to modify it’s properties on the left panel. For my sample the output is a Boolean (true or false).
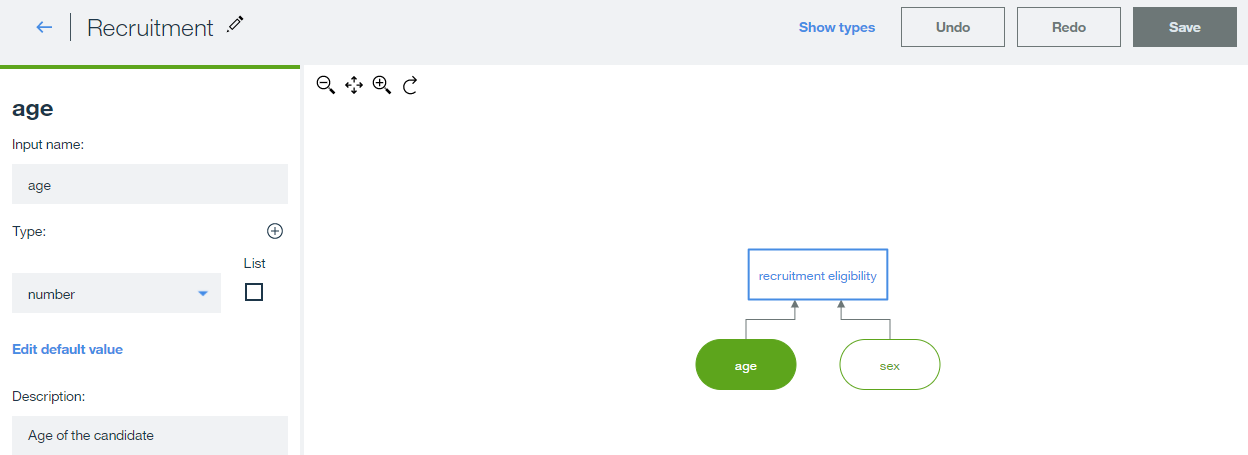
- Now that we have our Decision Node we need to add the Input data that will determine the rule outcome. Hover over decision node, click the + symbol and select “Input Data”.
- Do the same for each data field you need in your rule, in my sample I will need the age and sex of the candidate.
- Tip: Remember you can specify default values for each data
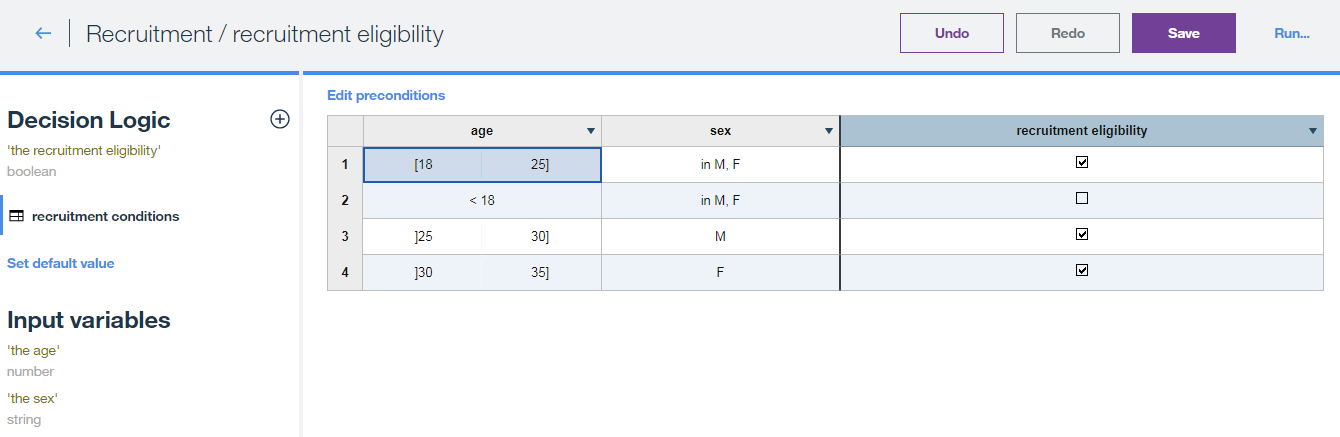
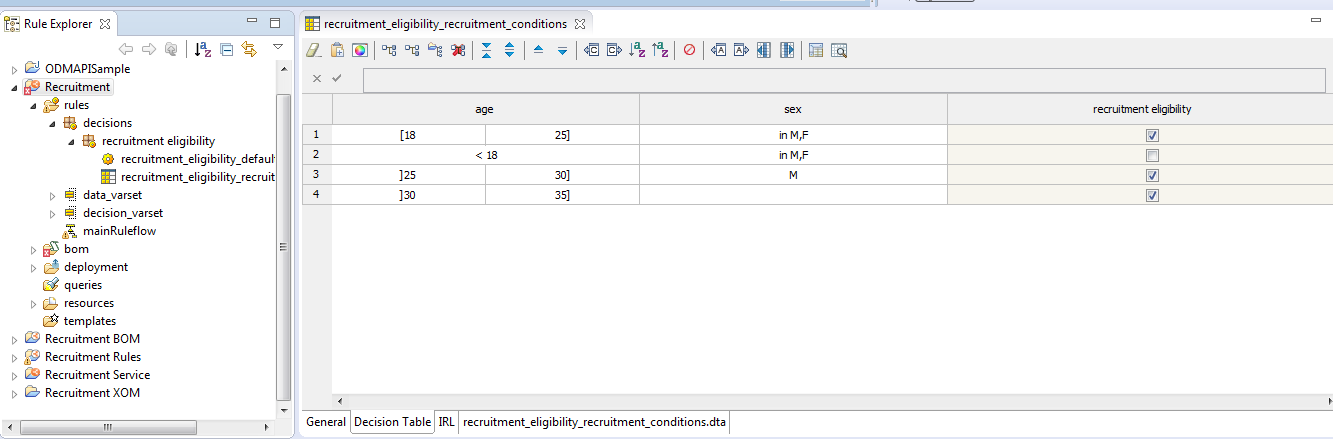
- Now we need to edit our business logic. Select the decision node and click “Edit decision logic” on the left panel. We can work with rule actions or decision tables. In this sample I will use a simple decision table to specify some rules:
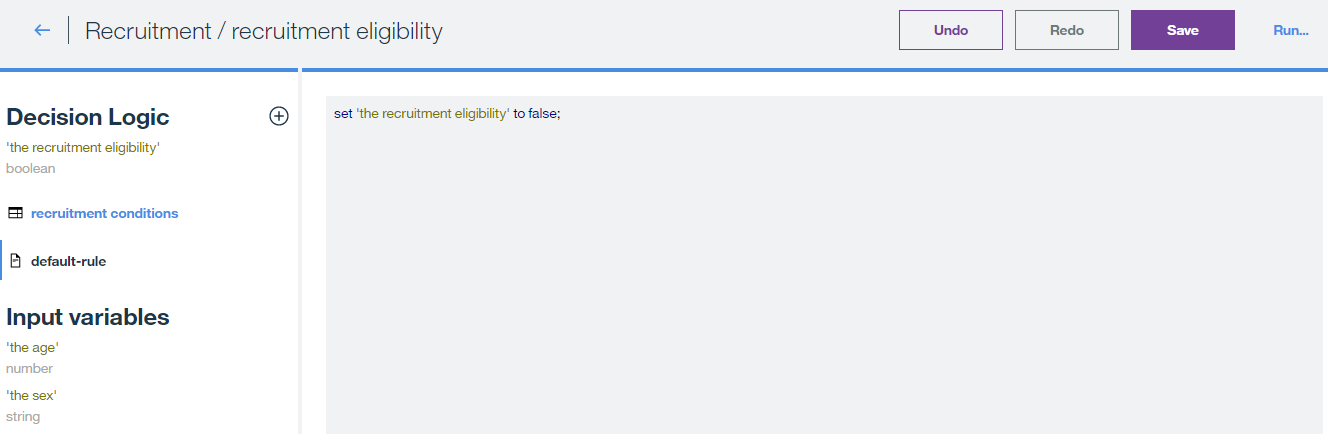
- Set a default value for the outcome variable:
- Save your changes.
- Testing and deploying our Decision project
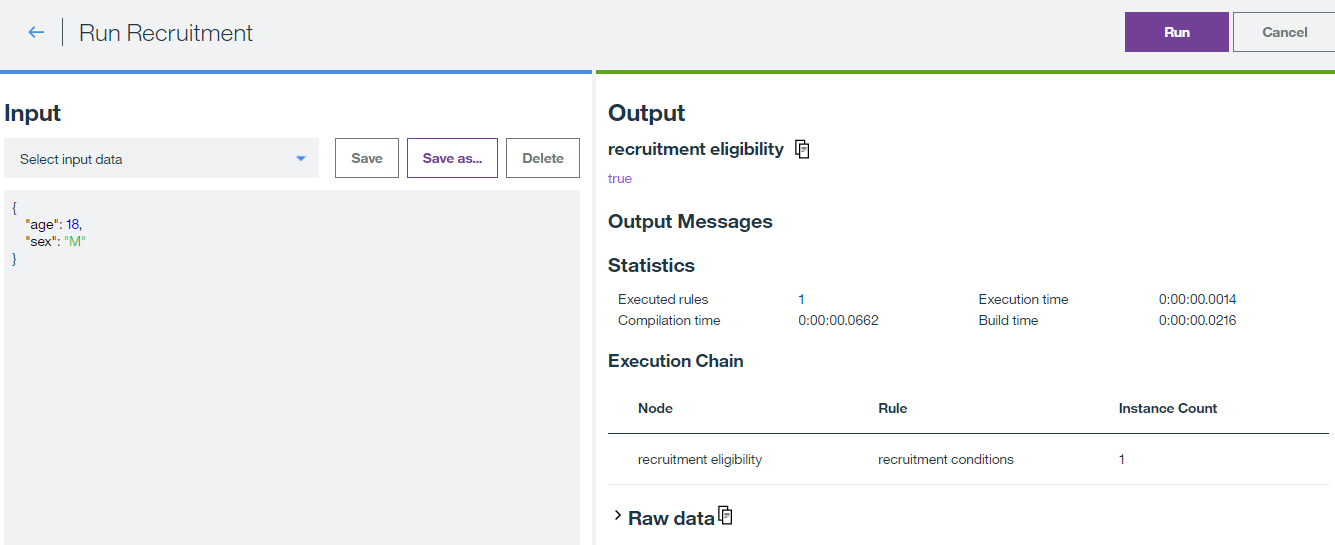
- Return to the main project screen, click “Run” and test the different scenarios of your rules:
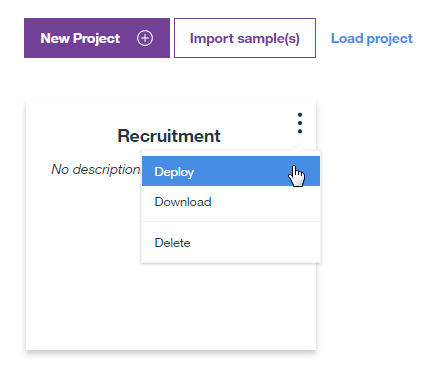
- Now you can deploy your project to your Bluemix Business Rules RES. Return to the project selection screen, hover over your decision project and click “Deploy”
- Input the Bluemix RES URL, username and password. Your rule is ready to use on the cloud.
- Return to the main project screen, click “Run” and test the different scenarios of your rules:
- Integrating the project with IBM ODM Rule Designer
- A great feature is that you can download this project and import it to your Rule Designer Eclipse workspace.
- In the same options list, click “Download”.
- In your Rule Designer workspace select File – Import – Existing projects into Workspace. Search for the files by viewing all file types and that’s it!
Let me know if you want to see more content like this and explore with the Decision Composer and DMN more. I hope you enjoy this tutorial and as always please feel free to contact me for any feedback or questions! Thank you!