Deploying Rule projects into IBM Bluemix
IBM Bluemix is a cloud platform that helps you solve real problems and drive business value with applications, infrastructure and services. There are other powerful cloud services like AWS, Azure or Google Cloud platform but IBM Bluemix comes with pre-designed services for your IBM software solutions. In this article we will see how the Business Rules service allows us to deploy our Decision Operations from Rule Designer or Decision Center console directly to IBM Bluemix cloud. In order to test this you will need to create a IBM Bluemix account that comes with 30 days free trial.
Steps:
- Creating the Business Rules service
- Login to your IBM Bluemix account.
- Click “Catalog” and search for “Business Rules”
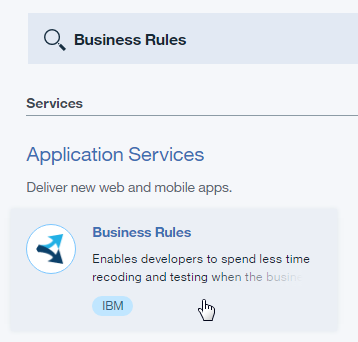
- Tip: This service gives you 1,000 API calls free per month that is more than enough for dev purposes, you can cancel the service at any time.
- Click “Create” and give a proper name.
- Navigate to the “Connection Settings” tab and you should be able to see the connection details like this:
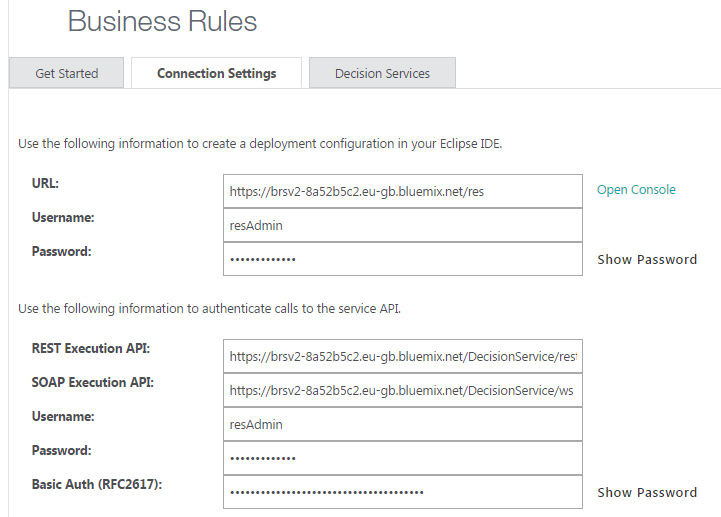
- Tip: Click “Open Console” and navigate just like in your RES local installation.
- Configuring the Deployment
- Now that our Business Rules service on IBM Bluemix is ready, let’s configure and deploy the Rule project.
- Open Rule Designer and navigate to the deployment folder of the Rule project.
- If you have a previous deployment configuration already set up you can just add the new IBM Bluemix RES server target:
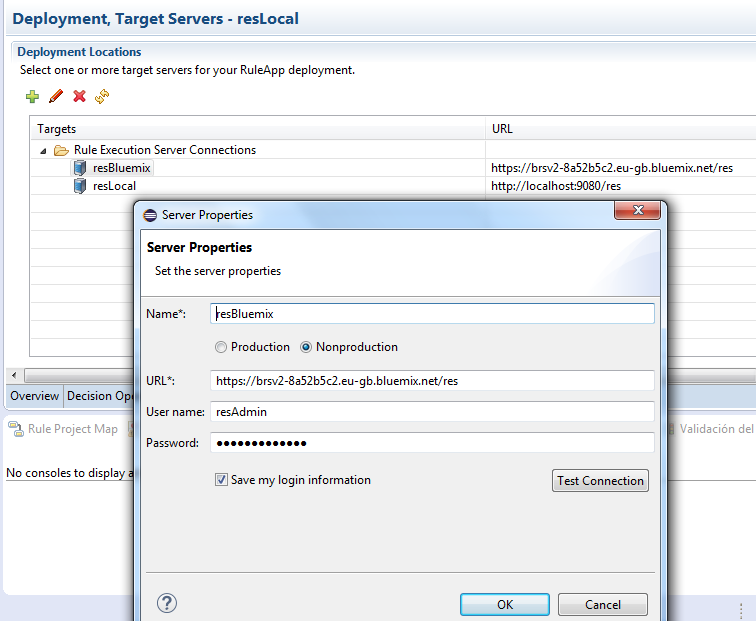
- Insert the Bluemix connection details and test the connection.
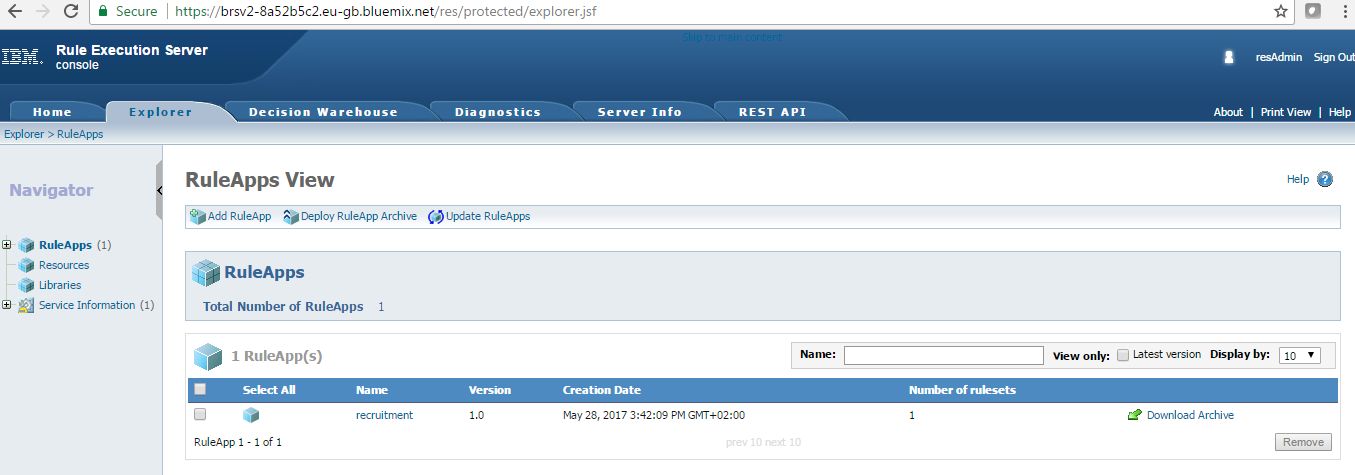
- Deploy the Decision Operation Ruleapp and verify the deployment by accessing the IBM Bluemix RES console.
- The Ruleapp should appear like this:
- Testing our Rule web service in SoapUI
- Navigate to the Ruleset view by clicking on the Ruleapp Name and then the Ruleset name in the RES console.
- Click the “Retrieve HTDS Description File” option:

- Download the SOAP HTDS file or click view and copy the WSDL URL.
- Open SoapUI and create a New SOAP project.
- Insert the wsdl URL, username and password.
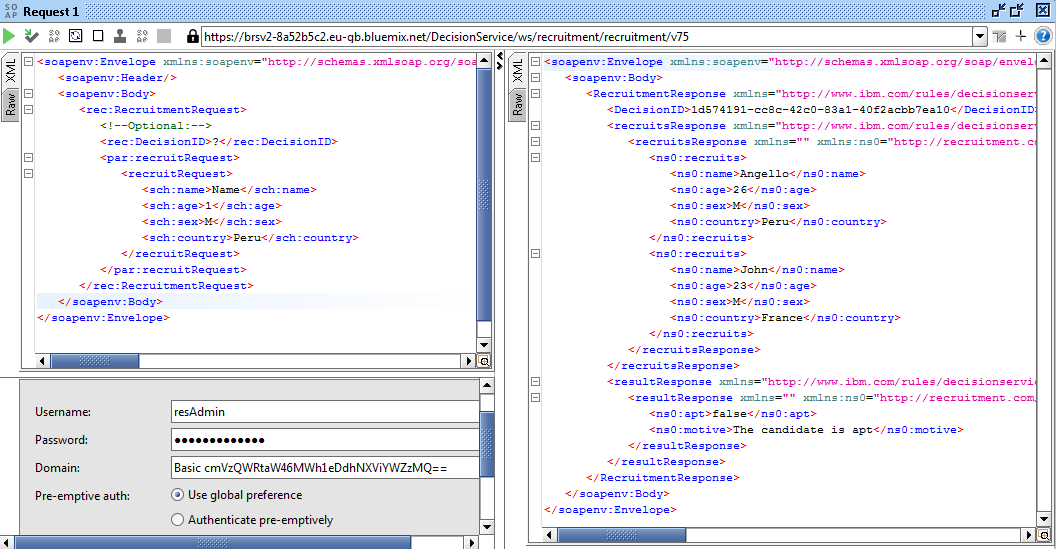
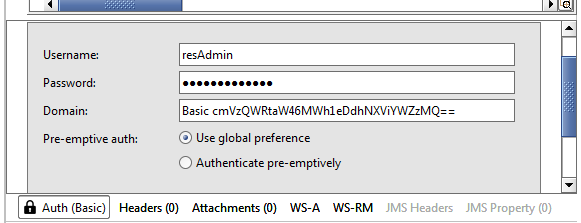
- Now you have the request ready, the only thing missing is the security authorization. Click the “Auth” option and select Basic, type the Bluemix Business Rules service username and password.
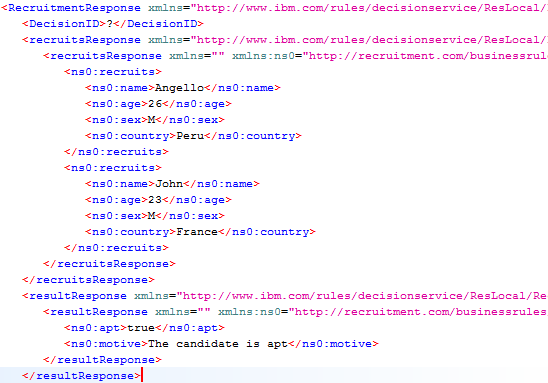
Results:
You are ready to call your Rules from anyplace, anywhere. Just share your WSDL url with the client application and give the proper authorization. Having the Rule Execution Server on the cloud is a great way to test your rules in development without depending on your local Sample Server.
I hope you enjoy this tutorial and as always please feel free to contact me for any feedback or questions! Thank you!
- Published in Bluemix, Cloud, Rule Authoring, Rule Designer, Rule Execution Server (RES)
Working with Lists in the XOM / BOM
The XOM (Execution Object Model) and BOM (Business Object Model) are key artifacts of our Rule project. The execution object model (XOM) is the model against which you run rules, it references the application objects and data, and is the base implementation of the business object model (BOM). For more information about XOM/BOM visit the IBM Knowledge Center here.
We can generate our BOM entries from a XOM (Java or XSD) and get the objects we will verbalize for our rules. A very common requirement in a project is to work with Lists and return a populated List with values from a Rule Action or Decision Table. You will notice that after you create your BOM entry from an XOM with Lists (maxOccurs=”unbounded”) you will get an object of type java.util.Vector but with no direct relationship between the elements. Please review the following problem example and a workaround on how to fix it and implement Lists correctly.
Problem:
Let’s say you have an XSD with an element like this:
<complexType name=”RecruitsList”>
<sequence>
<element name=”recruits” type=”tns:Recruit” maxOccurs=”unbounded” minOccurs=”0″></element>
</sequence>
</complexType>
After you create the BOM entry, you will get an object like this:
With no proper verbalization and without a way to use it in a Rule Action, Decision Table or Decision Tree correctly. In this example we want to add objects of type Recruit to our RecruitsList and display this list in the output of our Decision Service. Follow the steps below to implement a workaround and accomplish our goal.
Steps:
- Creating a new Method member
- Let’s remove this verbalization and navigate to the Class tab.
- We are going to create a new method to add our Objects. Click “New…” in the Members section.
- Select “Method”, give a proper Name and “void” for Type.
- Now add Arguments according to the Object you are going to add to your list, in our example the Recruit’s attributes. At the end you should have something like this:
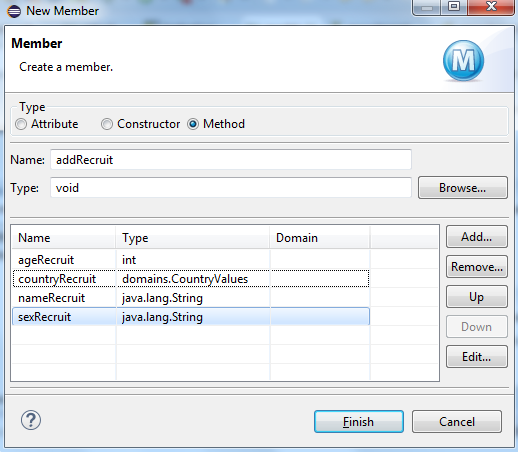
- Tip: Remember that the types have to match, if you are using a virtual value assign the corresponding type like the example. For more information about dynamic domains and virtual values read my previous post here.
- Now we need to create a proper verbalization for our new method and implement the BOM to XOM Mapping logic.
- Navigate to the Member Verbalization section and click “Create”. Modify the Action phrase according to your Object. In this sample:

- The last and most important step is to define our BOM to XOM Mapping logic. We need to map our method arguments with the attributes of our Object, in this sample with the Recruit’s age, country, name and sex:
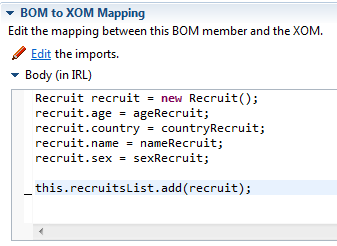 Tip: Don’t forget to initialize the response list variable in your ruleflow or variableSet.
Results:
Now we are ready to use our method in any Rule and return a list structure schema in our Decision Service response!
Decision Table demonstration sample:
After we test our rules we will see this list structure in the response (Testing with SoapUI):
Please feel free to comment or contact me with any doubts or feedback. Thank you!
- Published in Java, Rule Authoring, Rule Designer, Rule Execution Server (RES)
